TV capturing and producing High quality Videos is very lenghty and tiring process if u dont know anything, and this Tutorial is going to make everything simple for you. It took me six months to learn several aspects of this process.
Steps before Setting up your TV Tuner.
1. First and very Important step is to confirm that you get Cable Connection directly from the Emplifier and to the max only ONE Split in the connection ![]() .
.
2. I use PINNACLE PCTV.Experts suggest to go for Pixel View TV Tuner Card so go for it if r planning to purchase a new one.
Settings in TV Tuner.
1. After Installation, run auto channel scan.
2. You can also rename the channles and u watch only selected channels then u can drag them into favourite folder for quick access.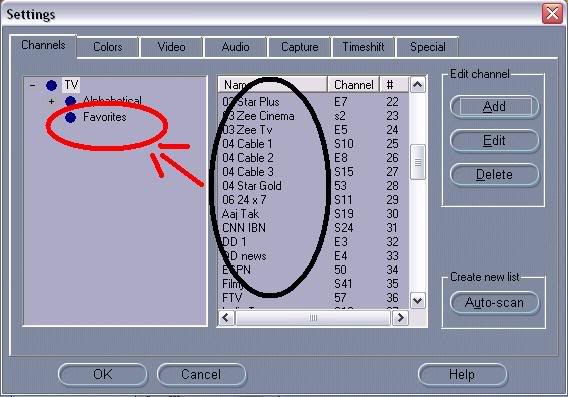
3. You can change colour settings as per your requirement, but I prefer not to change it and let it remain as DEFAULT.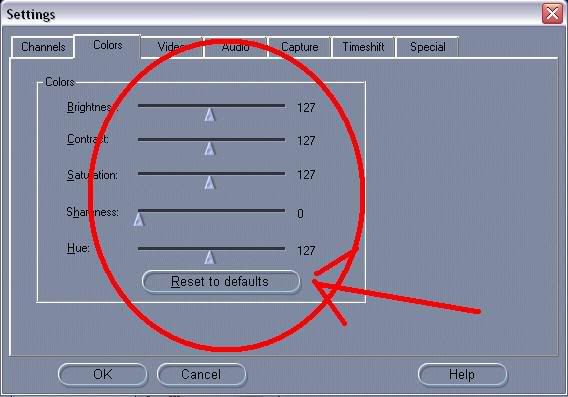
4. Select "2 fields deInterlaced" option in Video Display. This is the MOST IMPORTANT step for clarity of Video.
5. Keep sound recordning level as low as possible. I prefer to keep at 15-20.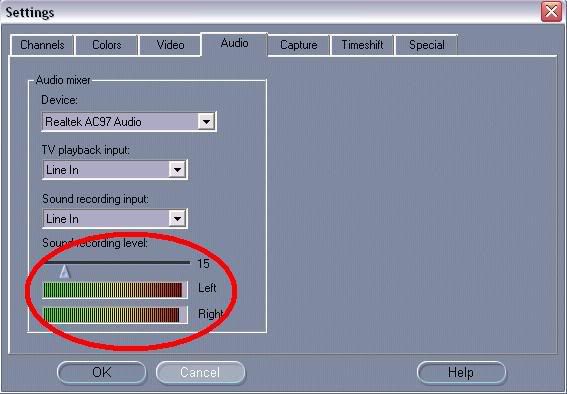
6. Capturing is most important part. The higher quality of video u record, higher quality of video u can produce, its as simple as that.
I record video in DVD MPEG2 format. bitrate 6 Mbits/s and Video size 720 x 576.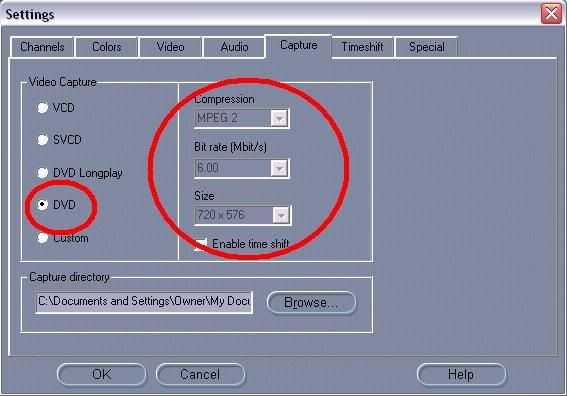
We are done with Settings in TV Tuner. Second part is to Make high Quality Caps ![]()
Note : Every TV Tuner has this option, which is highlighted in below image. You have to be very accurate to cap in fraction of second. But wait, we have a second option and that is VirtualDub ![]() .
.
Using Virtual Dub for Taking Caps :
1. Open the Video in VirtualDub. Make sure u have VDUB MPEG2.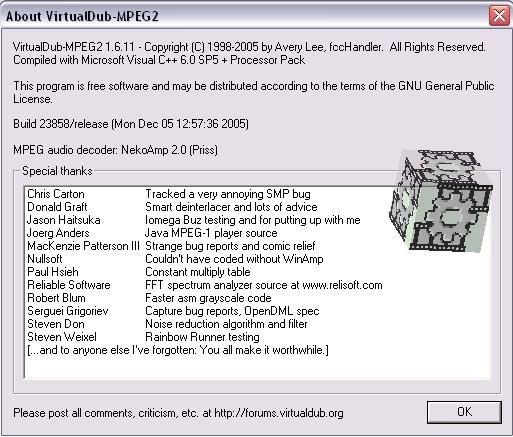
2. See the below pic. You can see the bar... u can capture the images frame by frame here. But wait... we can use VDub features to improve the quality, which we will see in next step.
3. GO to Video > Filter > Select Deinterlace Filter > select Blend Fields together [best] option.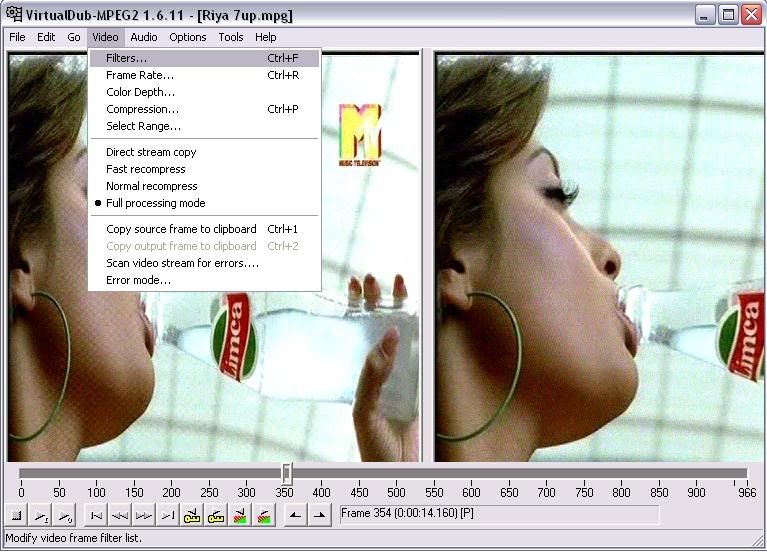
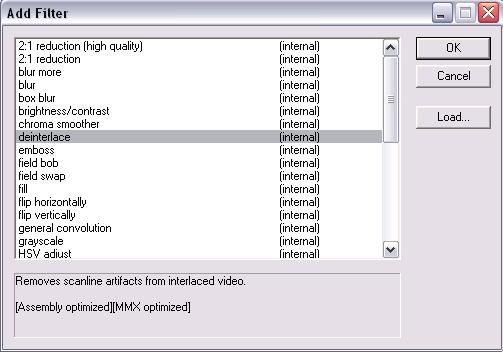
4. Again goto Video > Filter > select smoother > keep value as 10 or as per ur preference ;).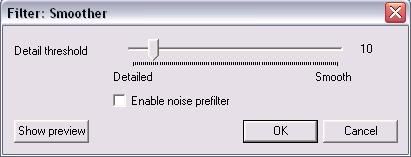
5. You can also crop unnecessary areas in the frame with the "cropping" option shown in the below pic.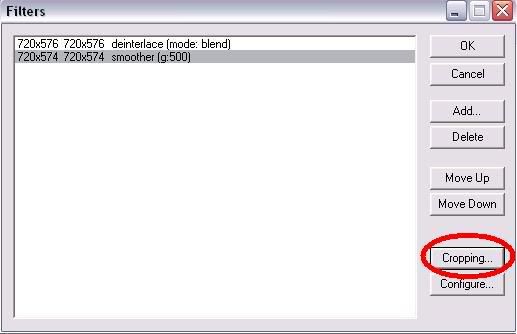
6. If u wish to watermark ur caps / video, then there is a logo option in the filters list.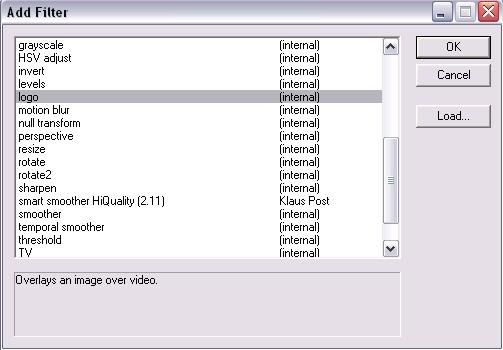
7. Now u r done with settings for making caps... u can copy the output source to clipboard and save with either paint or using photoshop ;).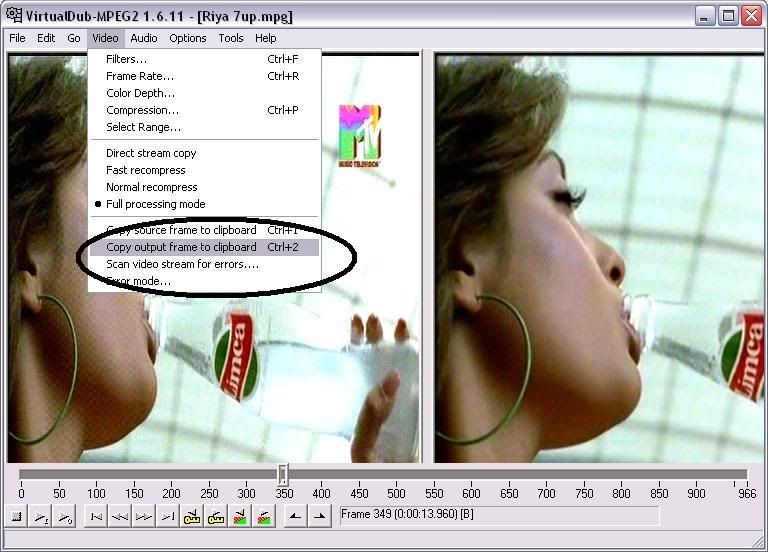
Improving quality of caps in Photoshop (CS2) :
If you have taken snapshot from TV Tuner then u can directly open that in photoshop or if u r using VDUB then copy the output source clipboard and paste in photoshop.
1. Open image in photoshop. Select Filter > Noise > Dust & Scratches > Input 2 to both Radius & Threshold then press OK.
2. Again Select Filter > Noise > Reduce Noise > Enable Preview > Select Basic > Settings-Default > Strength-5 > Preserve Details-11, Reduce Color Noise-74, Sharpen Details-21. Dont forgtet to Enable Remove JPEG Artifact ;). Press OK.
All the Process is complete now.
You can alter the values according to your satisfaction.Compressing and encoding High Quality Video Using Vdub:
We have recorded the video at 6 Mbits (6000Kbps). With the help of DivX we can compress it to 1500kbps without affecting quality.
1. Remember to keep the settings we kept for TV Caps. For compressing High quality Videos u can use either DivX or Xvid codec. I prefer Divx as we are dealing with TV recorded Videos which need more workout.
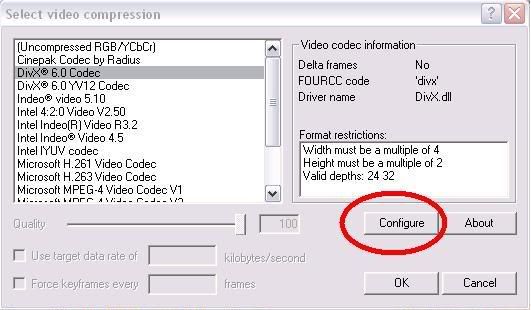
2. Go to Video > Compression > Select DivX > Click Configure.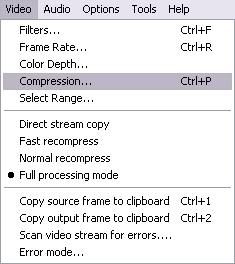
3. In Main tab > Keep Certification Profile as Unconstrained > in Bitrate > 1-pass & keep value as 1500kbps.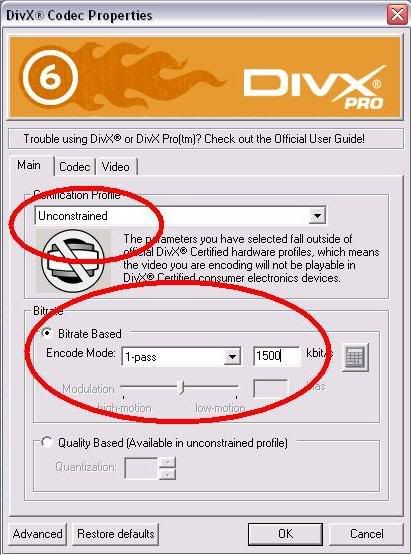
4. In Codec Tab > keep settings as INSANE Quality. This is MOST Important, Dont change this!!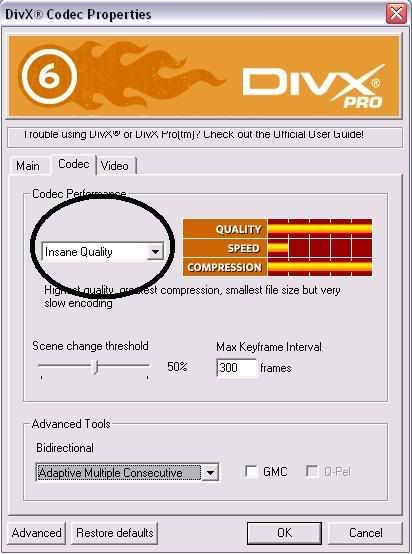
5. In Video tab > u can keep settings as per ur preference but Do not increase the resolution of ur image. Now u can come out of DivX settings.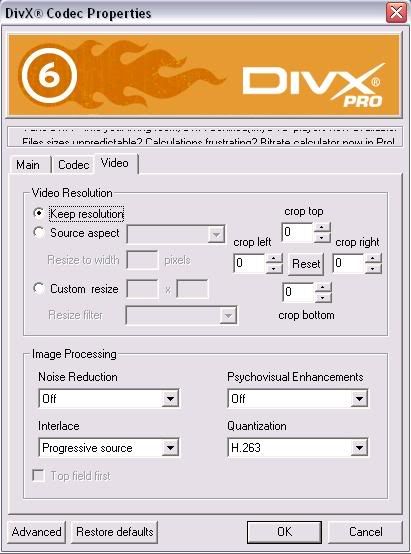
6. In Audio Tab > Select Full Processing Mode > Then Select Compression > MPEG LAYER - 3 > and keep 24kBits/s mono for normal video and 56kBits sterio for a video which contains music ;).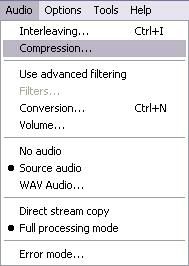
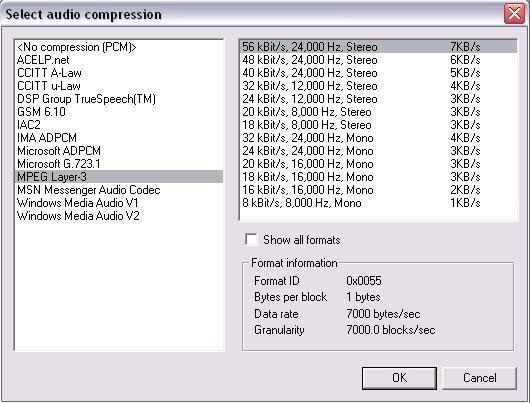
NOTE : Selecting INSANE Quality option is going to take hell lot of time so be patient. If u r in hurry u can select any of the other options but that is gonna affect quality. In Audio Compression You can select NO Compression as well, but that is gonna make file size bigger ;).
Thats all done. If you have suggetions, just comment on it.
Hard Drive MP3 Players Mice Road Warrior Essentials USB Audio DVD Writers Flash Applications Drives & Readers Host Controller Issues (Onboard, PCI, CardBus) Technology Video Capture, PVR, TV Adapters Wired, Wireless Network flash memory mp3 players joysticks, joypads keyboards usb drives gadgetry hubs webcams webcams, digital still cameras
Subscribe to:
Post Comments (Atom)
0 comments
Post a Comment